1. Ensure Enough Disk Space
Insufficient disk space can prevent System Restore from completing. Ensuring adequate free space on your system drive can help resolve this issue.
Check Disk Space:
- Press
Windows + S, type “This PC,” and select it. - Right-click on your system drive (usually C:) and choose “Properties.”
- Check the available space. If it’s low, consider freeing up space by deleting unnecessary files or using Disk Cleanup.
- Press
Free Up Disk Space:
- Press
Windows + S, type “Disk Cleanup,” and open the Disk Cleanup tool. - Select your system drive and check the boxes for files to delete, such as temporary files and system cache. Click “OK” to remove them.
- Press
Ensuring sufficient disk space helps System Restore operate smoothly by providing the necessary resources.
2. Check System Files
Corrupted system files can cause System Restore to fail. Running system scans can help detect and repair these issues.
Run System File Checker:
- Press
Windows + S, typecmd, right-click on “Command Prompt,” and select “Run as administrator.” - Type
sfc /scannowand press Enter. The tool will scan and repair corrupted system files.
- Press
Use DISM Tool:
- In the Command Prompt window, type
DISM /Online /Cleanup-Image /RestoreHealthand press Enter.
- In the Command Prompt window, type
System scans help repair corrupt files that might be causing System Restore to fail.
3. Disable Antivirus Software
Antivirus software can sometimes interfere with System Restore operations. Temporarily disabling it might resolve the issue.
Disable Antivirus Software:
- Open your antivirus software and look for an option to disable it temporarily. This option is usually found in the settings or context menu.
Retry System Restore:
- After disabling your antivirus, attempt the System Restore process again.
Remember to re-enable your antivirus software after completing the System Restore process to ensure continued protection.
4. Verify System Restore Points
System Restore points can become corrupted or missing, leading to errors. Checking and ensuring the integrity of these points can resolve the issue.
Check Available Restore Points:
- Press
Windows + S, type “Create a restore point,” and select it. - In the System Properties window, click “System Restore” and review the list of available restore points.
- Press
Create a New Restore Point:
- If the available restore points are problematic, try creating a new restore point by clicking “Create” in the System Properties window.
Creating a new restore point can help establish a stable state for future restores.
5. Boot into Safe Mode
Booting into Safe Mode can help bypass certain issues that might be preventing System Restore from completing successfully.
Enter Safe Mode:
- Press
Windows + R, typemsconfig, and press Enter. - Go to the “Boot” tab and check “Safe boot.” Click “Apply” and restart your computer.
- Press
Perform System Restore in Safe Mode:
- After rebooting into Safe Mode, attempt the System Restore process again.
Safe Mode loads minimal drivers and services, which can help resolve conflicts preventing System Restore.
6. Check for Malware
Malware infections can interfere with System Restore operations. Running a malware scan helps detect and remove potential threats.
Run Windows Security Scan:
- Press
Windows + Ito open Settings, go to “Privacy & Security” > “Windows Security” > “Virus & threat protection.” - Click “Quick scan” or “Full scan” to check for malware.
- Press
Use Third-Party Antivirus (if needed):
- Consider using reputable third-party antivirus software for a more thorough scan.
Removing malware can help resolve issues related to System Restore and improve overall system stability.
7. Check System Restore Service
The System Restore service must be running for the process to work correctly. Verifying and restarting this service can help resolve issues.
Open Services:
- Press
Windows + R, typeservices.msc, and press Enter.
- Press
Locate and Restart System Restore Service:
- Find “Volume Shadow Copy” in the list of services, right-click it, and select “Restart.”
Verify Service Startup Type:
- Right-click “Volume Shadow Copy,” select “Properties,” and ensure the Startup type is set to “Manual.”
Restarting the System Restore service ensures it is operational for future restore attempts.
8. Perform a System Reset
If none of the above solutions work, performing a system reset can help resolve persistent issues.
- Reset Your PC:
- Press
Windows + Ito open Settings, go to “System” > “Recovery.” - Click “Reset PC” and choose to keep your files or remove everything. Follow the prompts to complete the reset process.
- Press
Performing a system reset reinstalls Windows while preserving or removing your files, which can resolve underlying issues preventing System Restore.
Conclusion
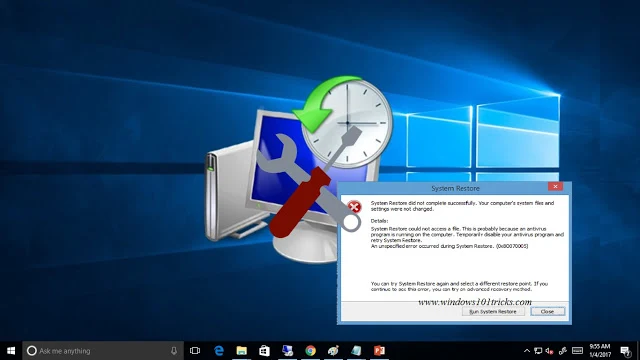
When "System Restore did not complete successfully" errors occur, addressing potential causes such as insufficient disk space, corrupted system files, antivirus interference, and system settings can help resolve the issue. By following these steps and ensuring your system is in good health, you can improve the likelihood of a successful System Restore and maintain a stable and efficient Windows environment.
Comments
Post a Comment